Scanner Pro
  • Website
  • Contact us
  • Free download

    Related articles are not found.
    Free download
    Contents
    • Using Scanner
      • Install Scanner Pro
      • Install Scanner Mini
      • Scanner Pro and Scanner Mini difference
      • Supported languages
      • Open the Scanner settings
      • Editing options in Scanner
      • How to crop and rotate scans
      • Choose your scan size (Custom, A4, A5…)
      • Change the color mode
      • Erase irrelevant details
      • Straighten curved lines on scans
      • Create a scan
      • Create a multi-page scan
      • Create a folder
      • Creating subfolders
      • Move scans into a folder
      • Rename a folder
      • Rename a scan
      • Reorder pages within a multi-page scan
      • Switch between the Grid and List views
      • Sorting options
      • Create Expense Reports
      • Import Documents
      • Choose between saving as a PDF, JPEG, or TXT
      • Share scans using the Export Button
      • Send faxes from the scanner app
      • Print scans
      • Share scans from cloud via a link
      • Share scans with Android devices
      • Transfer scans to desktop
      • Password protect scans while exporting
      • Share scanned files through a link
      • Use your cloud storage with Scanner
      • Connect new cloud storage and choose the upload mode
      • How to manually upload files to cloud storage
      • Use iCloud and Share with iCloud Drive differences
      • Text Recognition (OCR)
      • How to search through the recognised text
      • Scanner Widgets
      • Quick Actions
      • Scan documents in iMessages
      • Workflows
      • Smart Categories
    • Billing & Subscription
      • Use Scanner for free, or subscribe
      • How to check and manage your subscription status
      • How to cancel the free trial for Scanner PLUS
      • Refund processes in Scanner Pro and Scanner Mini
    • Troubleshooting
      • Missing/not loading scans in Scanner Pro
      • Can't email scans
      • Scanner crashes
      • There are no iCloud Sync and Store Scans in iCloud options in Scanner Pro Settings
      • Scanner freezes
      • Unable to scan
      • Restore accidentally deleted scans
      • Scans don’t auto upload to my cloud storage
      • Fax did not go through
      • Fax option is disabled
      • Can't delete duplicates
      • Auto-capture doesn't work
      • Can't see files in iCloud Drive
      • Pro features are unavailable
      • Scans are stored in another Readdle folder on iCloud Drive
      • Multipage scans are shared as separate files
    • Privacy & Data
      • Scanner privacy FAQ
      • Password protect the Scanner app
    • Contact us
    Home Using Scanner View & Manage your scans Import Documents

    Import Documents

    Keeping all documents in one place offers several benefits that contribute to organization, accessibility, and efficiency. By adding images and PDF files to your already existing scanned files, you can achieve easy sharing and reduce clutter. This is what the Import Documents feature in Scanner Pro is ready to offer.

    Jump to:

    • How to Import Documents
    • How to merge imported and scanned documents?
    • How to rename imported documents?

    How to Import Documents? 

    1. Launch Scanner Pro on your device. 
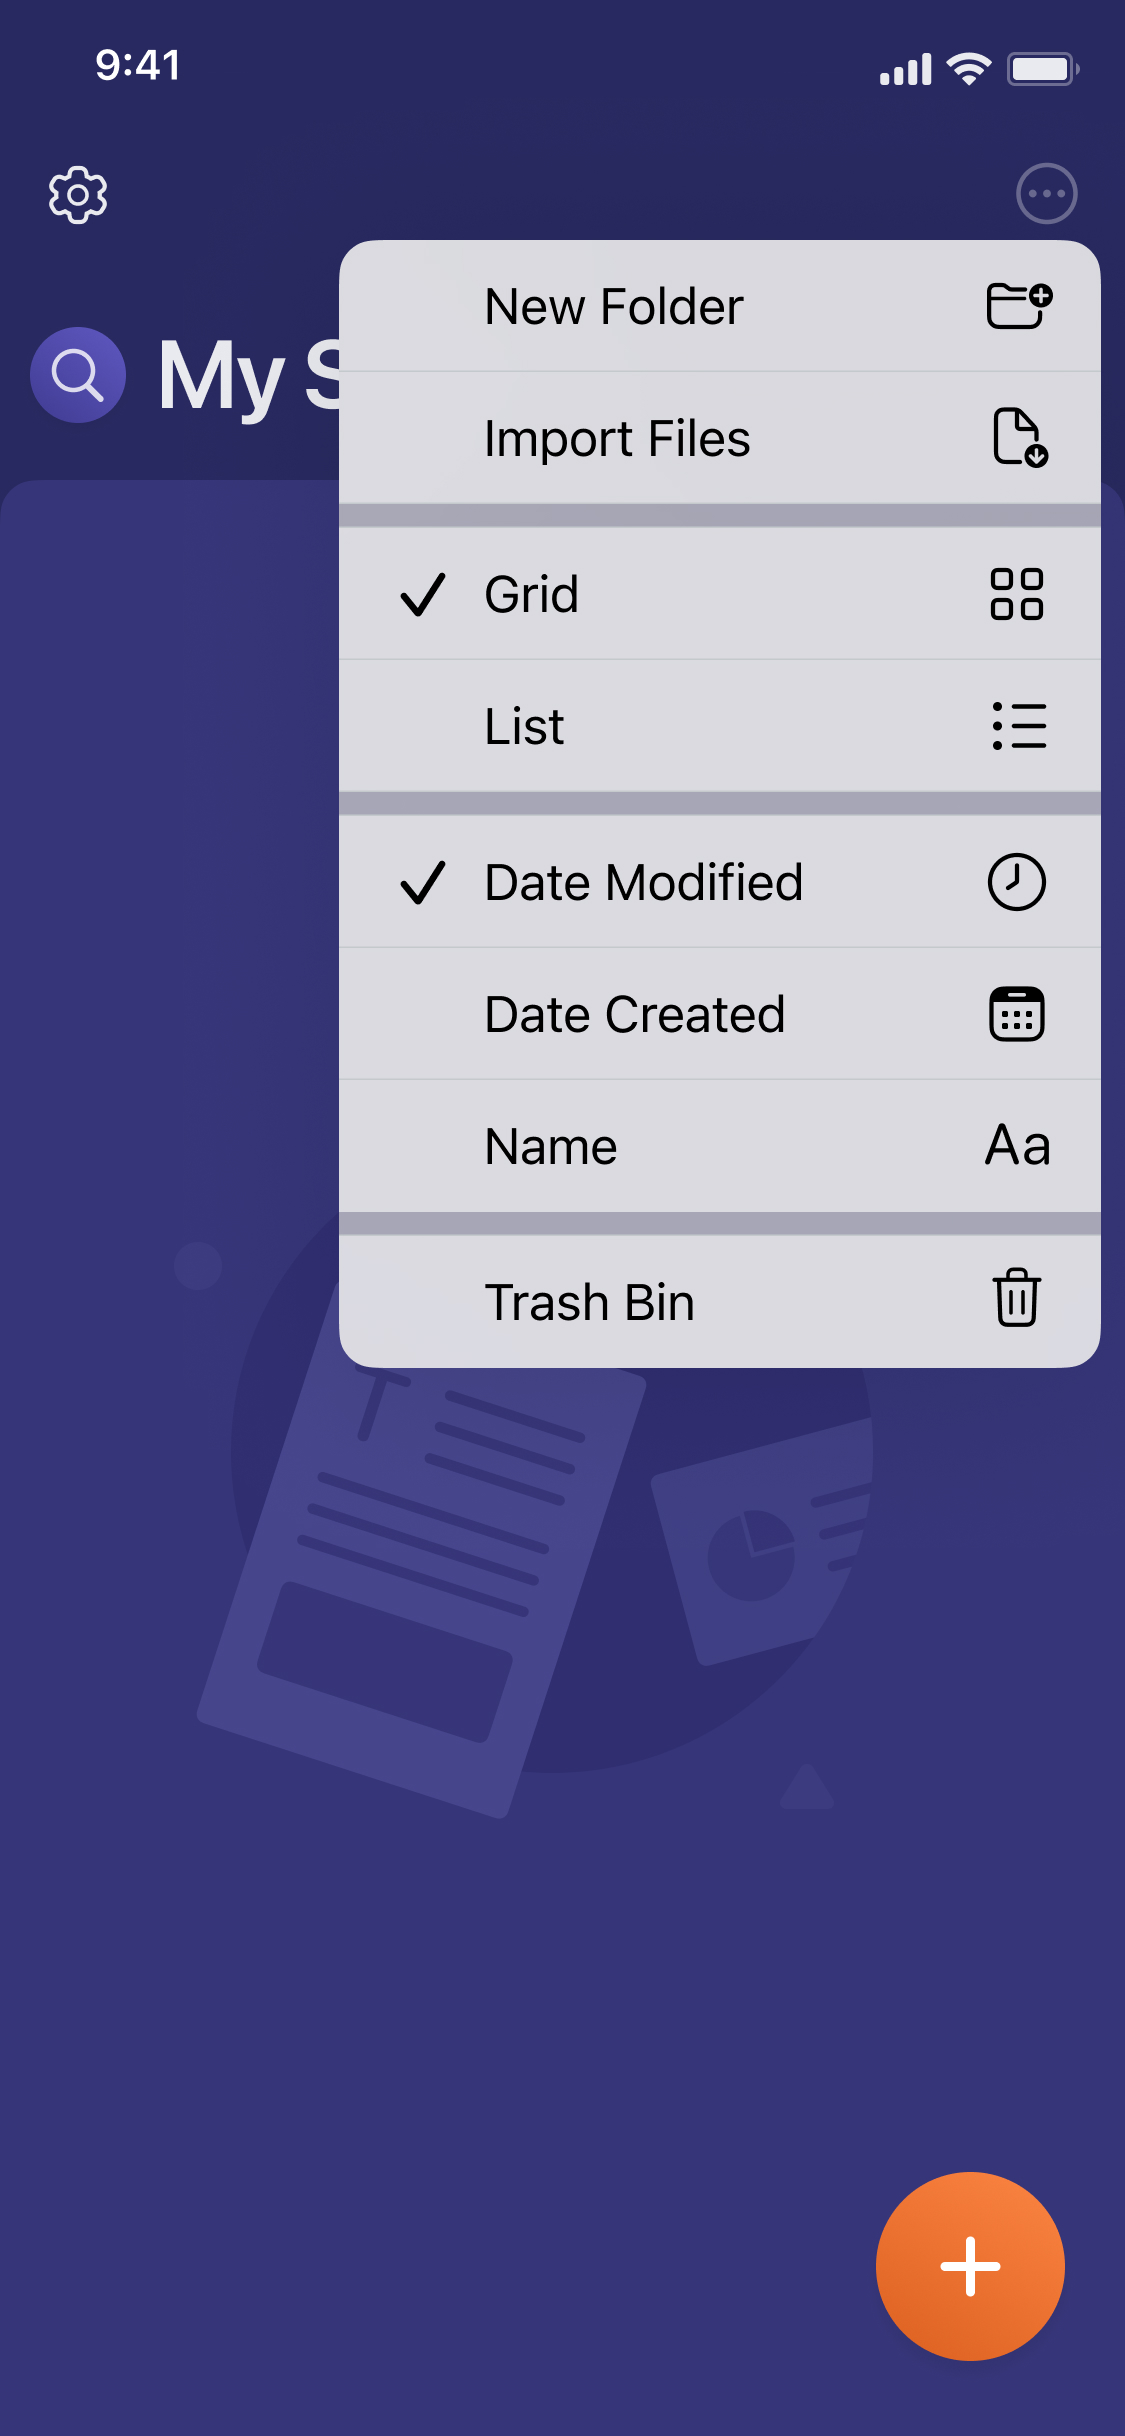
    2. Open the More menu on the My Scans screen.
    3. Tap the Import Files option. 
    4. Select documents for import from Files. Right now, the feature works for PDF and most image formats. 
    5. Wait for the progress indicator to show that the import is complete. 

    The imported documents will “behave” the same as the documents that you scanned. To see the imported documents, be sure to sort your documents by ’Date Created’, so they will appear at the top of your document list after folders.

    Tip: Create an ‘Imported’ folder and tap the Import Files in the More menu from the folder. This way, all your imported documents will be kept separately to avoid any confusion.

    You can choose one or multiple documents - selecting multiple documents imports them as separate files.  

    Note: The file’s name is taken from the imported files automatically.

    The imported documents will be kept separate and with their original name, just the way they appear in Files.

    How to merge imported and scanned documents? 

    In case you want to merge the files you’ve imported to the app with the already existing scanned files, you can follow these steps: 

    1. Launch Scanner Pro on your device. 
    2. Make sure that the files you want to merge are in the same folder, or sort them to see all files in the order of Date Created. 
    3. Select the needed files via the More menu. 
    4. Select Merge.

    How to rename imported documents? 

    Since the files you import to the app keep the original names, you can easily rename them in Scanner Pro if needed. For this, follow these steps: 

    1. Launch Scanner Pro on your device. 
    2. Go to the needed file.
    3. Tap the file’s name.
    4. Rename the document and tap Done.
    Was this article helpful for you? Yes No
    If you’d like to get individual help from our Customer Support team, follow the steps on the Contact Us page.
    We’d appreciate your feedback to help us improve the article:
    Thank you! Tell us more about your experience with Scanner Pro Help Center:

    It’s optional, but it will help us improve further 🙂

    How to

    • Create a new scan
    • Make better scans
    • Scan from Gallery
    • Edit a scan
    • Fax a document
    • Organize scans

    Company

    • Blog
    • About
    • Press
    • Careers

    Legal

    • Privacy Notice - Web
    • Privacy Notice - App
    • Terms of Service
    Copyright © 2007 - 2025 Readdle Limited.
    Apple, the Apple logo, MacBook, iPad, iPad mini, iPadOS, iPad Pro, iPhone, and Apple Watch are trademarks of Apple Inc., registered in the U.S. and other countries and regions. App Store and Mac App Store are service marks of Apple Inc., registered in the U.S. and other countries and regions.
    Terms of Service
    Privacy Notice