As our daily lives become more hectic, some things have to be done on the go - whether you’re running a business or working for a company, there are situations when you purchase something business-related. If your receipts are digitized, you can later reimburse your expenses or deduct them for tax purposes. Scanner Pro can offer you a fast and intuitive way to track your expenses and safely store the receipts within the app.
What is an Expense Report?
In general terms, an expense report contains an itemized list of expenses that can be used by small business owners, employees, and freelancers. We’ve come up with the idea of adding a feature like this to Scanner Pro since expense reports can provide several benefits for both individuals and businesses, including:
- Transparency: Expense reports can provide a clear and transparent breakdown of expenses incurred during a specific period, making it easier to track where money is being spent.
- Budgeting: Expense reports help businesses and individuals create and stick to budgets by identifying areas where money is being spent unnecessarily and where costs can be cut.
- Tax purposes: Expense reports can be used for tax purposes, allowing businesses and individuals to deduct eligible expenses from their taxable income.
The tool we’re introducing is very intuitive and easy to use - it’s an essential tool for businesses and individuals to track spending, manage budgets, and ensure financial accountability, and it can be used on the go with Scanner Pro.

How to create an Expense Report
In order to start, make sure to add scans to the app. If you already have the needed receipts scanned and ready, you can easily create your report:
- Launch Scanner Pro.
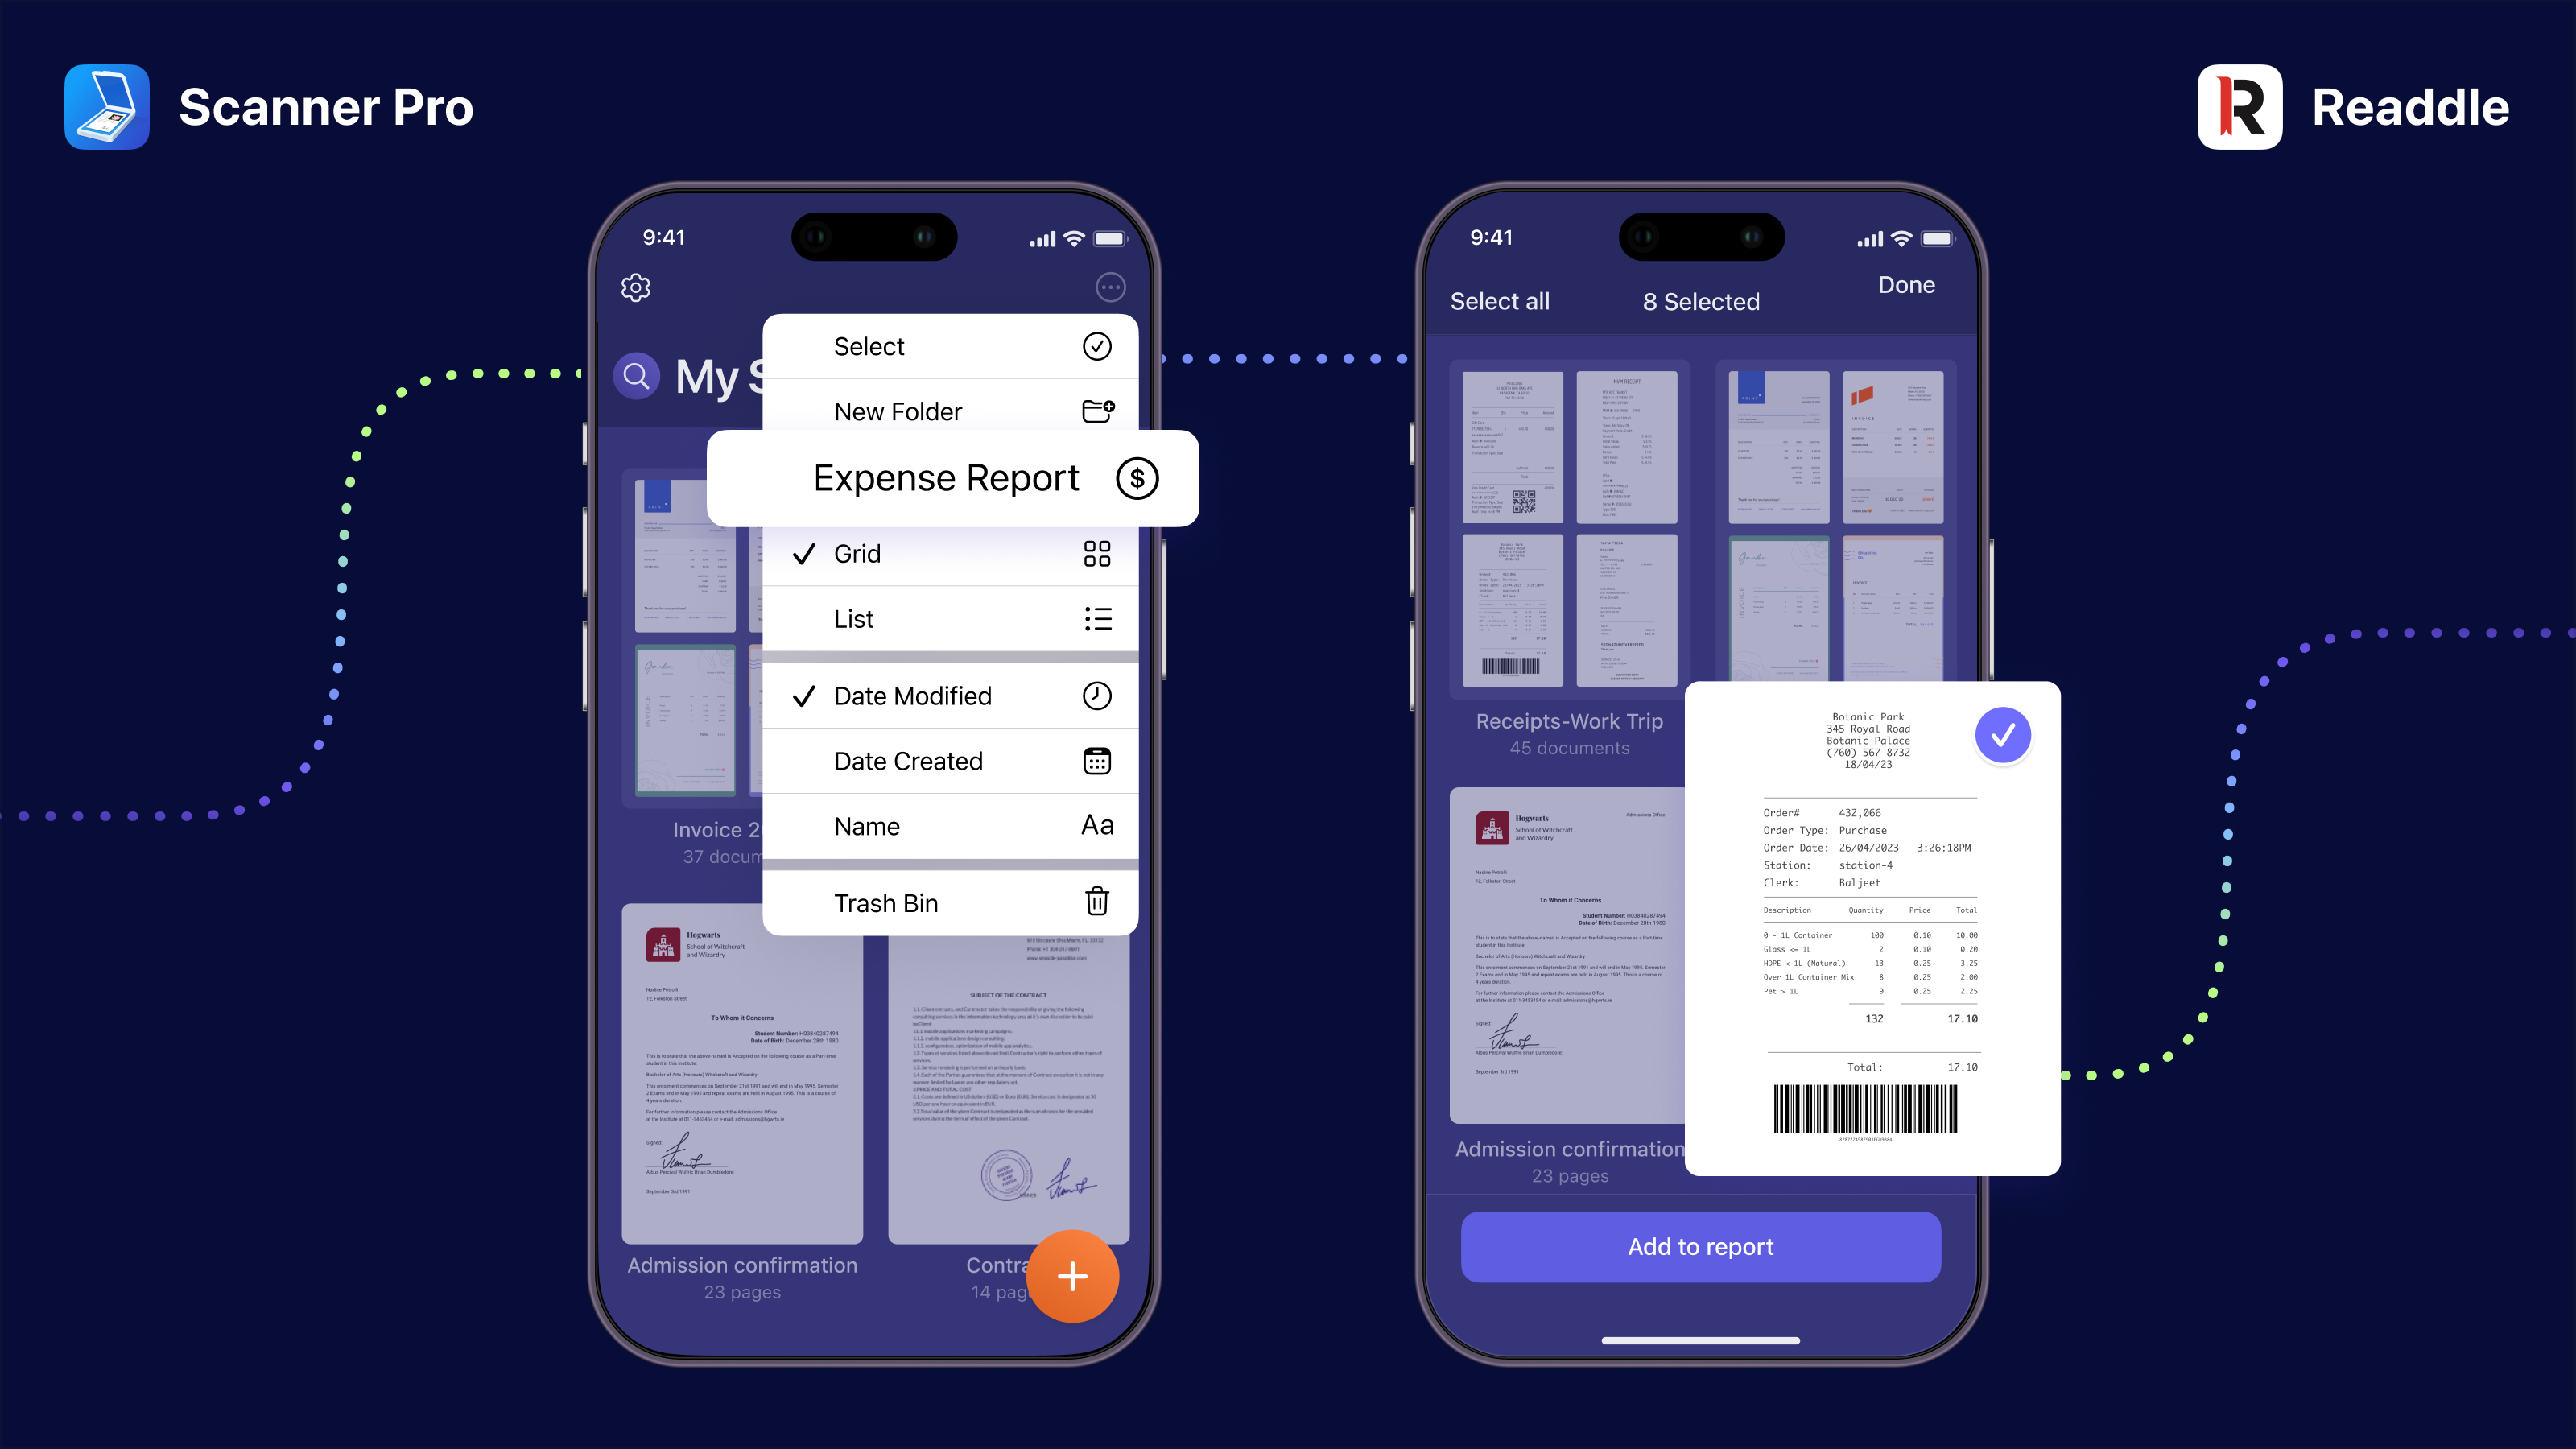
- Tap the three dots icon in the upper right corner of the screen while in the main view of the app.
- Tap Expense Report.
- Select your receipts and tap Continue. Make sure that you have an active Internet connection.
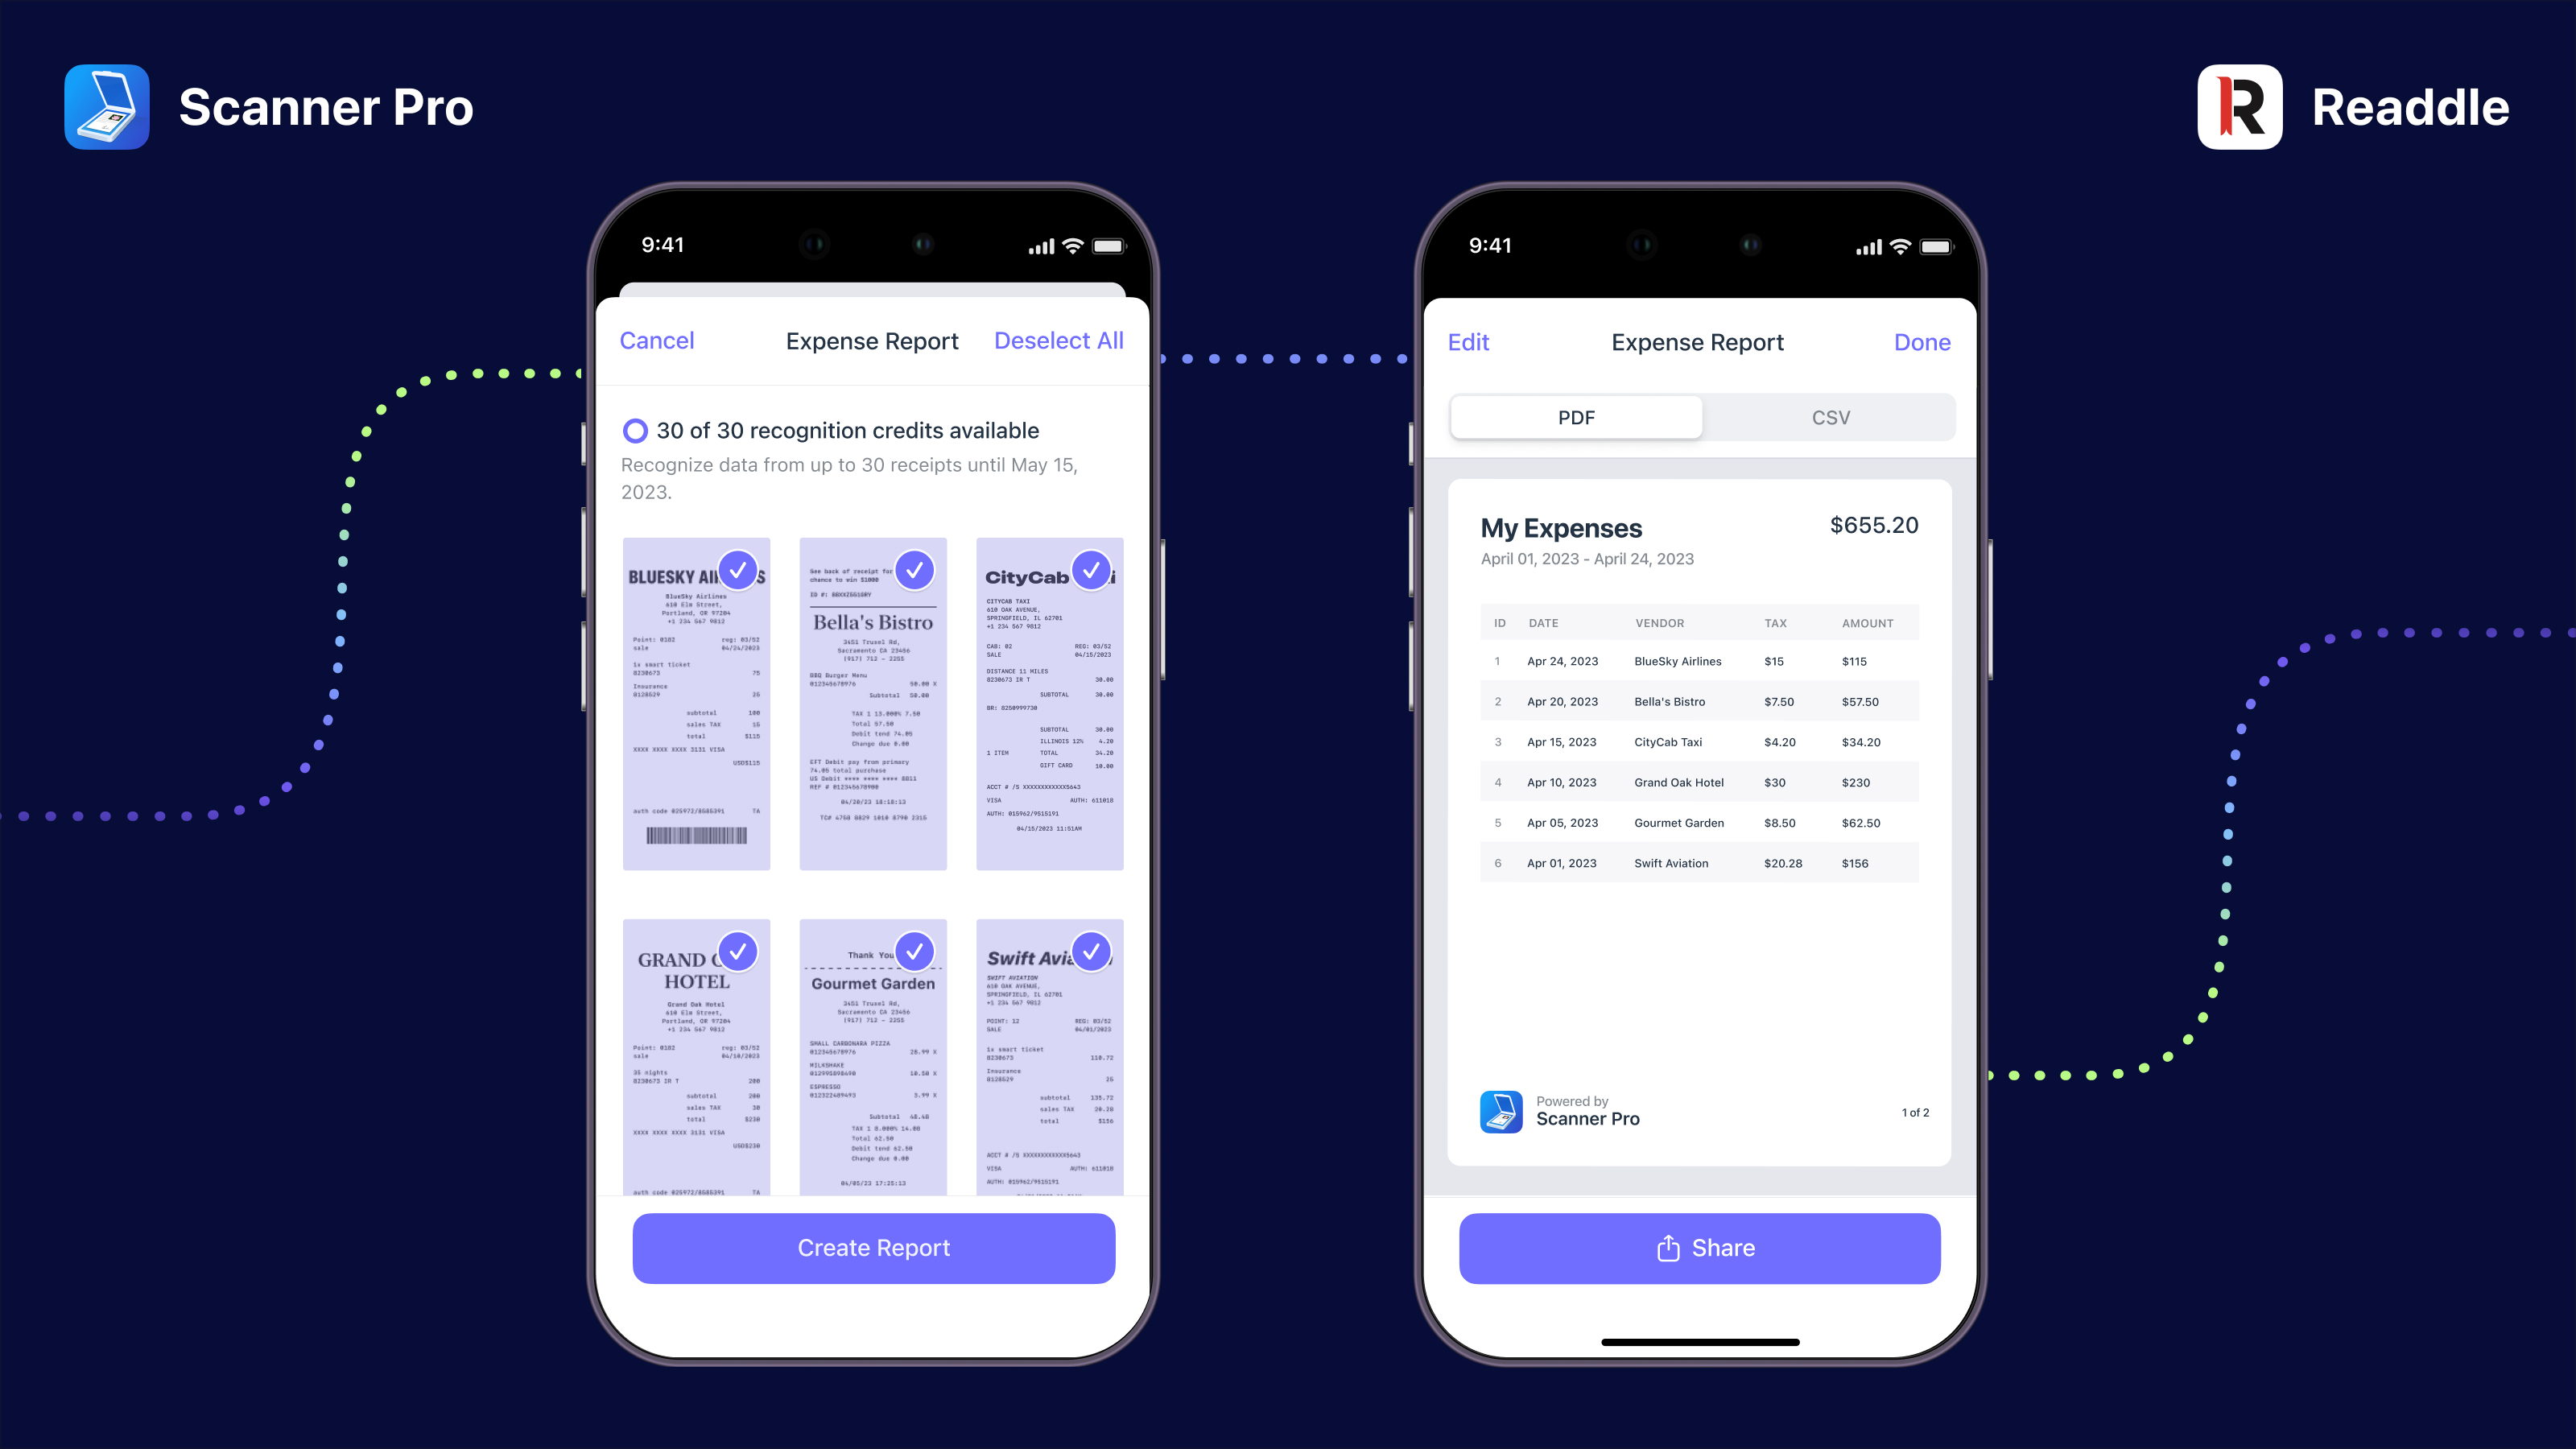
- Review receipts and tap Continue: Scanner Pro automatically captures all key information, such as Vendor, Date, Amount, Tax, Currency and Type, from your receipts and will create an Expense Report.
- Double-check the report and make any necessary changes by tapping Edit at the upper left corner of the screen.
- Use the PDF/CSV toggle at the top of the screen to choose the format in which you want to export your Expense Report.
- Share your Expense Report.

This feature is available as a subscription - for $4.99 per month, you get a limit of50 receipts, and you can choose the ones you want to include. Any receipts that remain unused cannot be carried forward to the following month; however, you can create as many reports as you wish with the already-recognized receipts.
To make sure you can benefit from this feature, try our 7-day free trial - 15 receipts are included.